Creating Your First Page
It is assumed that:
If you installed a kiosk system provided by your Kiosk Manager they may have created a folder for you. If so, you should use that.
If you created your own kiosk system, then you can either use the root folder (every kiosk system has a root folder) or you can create a folder yourself - see How To Create A Folder.
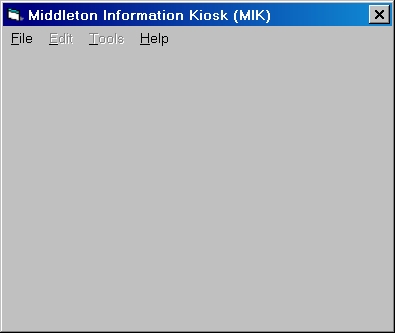
To run the MIK Editor, click the Windows Start button and then choose Programs, Middleton Information Kiosk, Editor. A window should appear like the one shown below.
Using the File menu, open your kiosk system. If you don't remember how to do this see How To Open A Kiosk System.
Then select ‘New Leaf Page’ from the Edit menu.
A new window will appear like the one shown below.
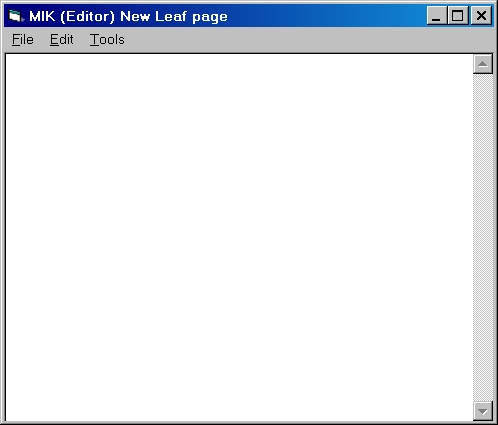
You will use this new window to create your first page. In fact, you now have your first leaf page. It's not very interesting, but it is a page!
On this window select ‘Save As’ from the File menu. A third window will appear like the one shown below.
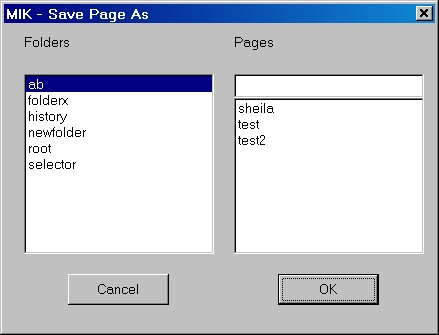
On the left hand side is a list of the folders in your kiosk system. Your list will be different! Click on the folder you have chosen to save your new page in.
The list on the right hand side now shows all the pages currently in that folder. This list may be empty.
Type the name you want to give your page into the box at the top of the list. This should be different from those already created and must consist of just lower case letters (a-z), digits (0-9), underscores (_) and dashes(-).
Click the OK button.
If everything is correct the window will disappear. If there is already a page with the name you have chosen, you will be asked if you wish to replace it with the newly created page. If you break the rule about which characters you can use you will be warned.
Return to the window headed "MIK (Editor) Leaf Page". Select ‘Make’ from the File menu. A window may briefly appear saying that your page is being made. When it disappears your page will have been converted into a form that can be displayed. If something goes wrong a message will appear on the screen saying what the problem is.
When you view your page it will look like the image below and it will fill the whole screen, so you need to remember how to "kill" the page and return to the Editor. You do this by typing the letter z on the keyboard. You can also interact with your page by pressing 1 for the top button (Home), 2 for the second button (Up) and so on, down to 8 for the bottom button (Back). As your page stands at the moment, it is possible not much will happen, but you may get some error messages appearing on the screen.
So, now select ‘View’ from the File menu.
All pages should have a title at the top, so let's add one. Return to the window headed "MIK (Editor) Leaf Page" and type
#title My First PageMake sure there is no space between the hash character (#) and the word title. Save the page by selecting ‘Save’ from the File menu. Then make the page again and finally view it.
#title is one of a number of directives that can appear in a MIK page file. All directives must appear on a line on their own with the # at the start of the line. A title directive allows you to specify a title for your page. You don't have to have a title directive, but if you do it should be the first thing in the MIK file. If you place it later, you may get some strange effects, but you can have more than one title directive if you want.
Next we'll put some text on the page. Return to the window headed "MIK (Editor) Leaf Page" and type after the title directive
   #para
   Some text that will appear on the page as a paragraph.
   #para
   Even more text that will appear on the page
   in another paragraph.
Make sure there is no space between the hash character (#) and the word para. The para directive must be on a line by itself. The paragraph is made up of all those lines following the para directive until another directive is found. Extra spaces, tabs and new lines within the paragraph are ignored. Go through the process of saving, making and viewing the page.
The next directive we'll explore is the image directive. You can type in all the elements of this rather complicated directive yourself, but it's much easier to use the tool provided. Place the cursor at the start of the second para directive and then select ‘Insert Image’ from the Tools menu. A window will appear like the one shown below.

The first thing you need is a JPEG image. Eventually, there needs to be a copy in the same folder as your MIK page. If you're very familiar with Windows, you could copy the image there yourself. But the tool will help you. Click the Find Image button. A standard File Open window will appear. Use this to find your image. Once you have successfully completed the directive, the tool will copy the JPEG image to the folder for you.
Next you need to decide whether the image will appear to the left or right of the page or in the centre. Chose one of Image Alignment options. If you chose left or right, any following paragraphs will be placed alongside the image. If you chose centre, any following paragraphs will be placed after the image.
Finally you need to decide how wide the image will be. You specify what percentage of the available width should be used. Enter a value between 1 and 100. If the image is the wrong width it will be resized to fit. However, enlarging small images is generally not very satisfactory, so it is best to start with as large an image as possible. In general, it is not a good idea to specify a width greater than 75% when the image is left or right aligned as the software often has difficulty fitting whole words alongside the image.
You might want to experiment with different settings of Image Alignment and Width.
Click on OK to close the Insert Image tool and the image directive will be added to your page.
Every time you change your page you need to save it and then make it before you can view it. If you forget the Editor will ask you whether you want to save or make the page. Alternatively, you can select ‘Save, Make & View’ from the File menu and the editor will do what's necessary without asking you.
Sometimes you will see some strange effects as the software attempts to combine images and paragraphs. A break directive (that is, a single line containing just the text #break) will force paragraphs to follow a left or right aligned image, rather than appearing alongside the image. Sometimes inserting a para directive before or after the image, with no accompanying text, helps.
You can type your instructions directly into the text box on this window, but if you want you can create your instructions using other software and then copy and paste them into this window. You can also copy and paste instructions from another MIK Editor window.